DTF Printing: Problems And Solutions
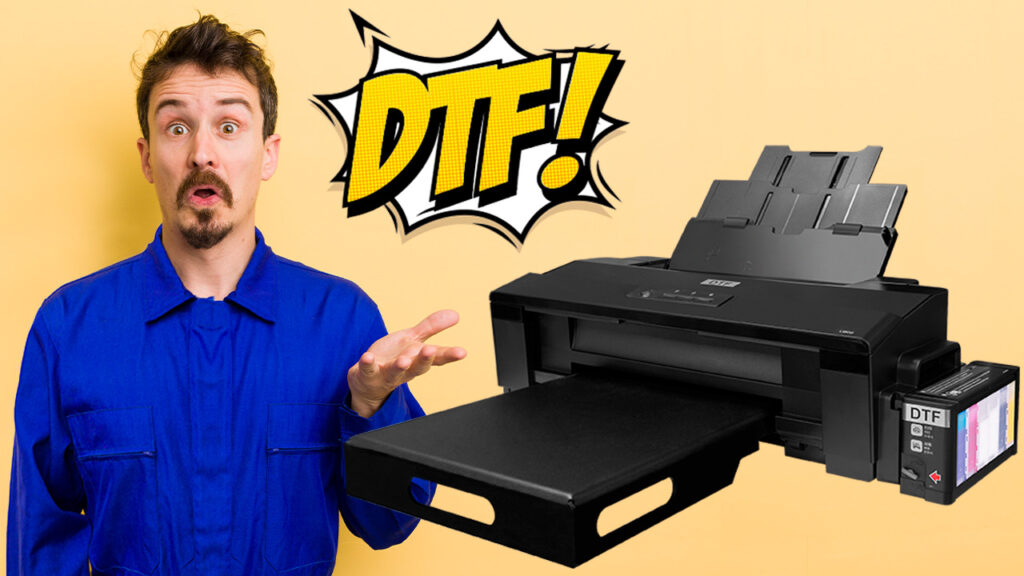
The DTF technique is becoming more and more popular amongst our clients. And for a good reason. They know that with a low investment they can start printing on different surfaces. Both on cotton and polyester fabrics. But also on wooden products, mugs or other objects such as skateboards.
If you have already switched to DTF printing or are interested, we want to help you. We have gathered the main problems of this technique to provide you with solutions. With these tips, you’ll turn into an expert, and your printer will be up and running again. Interested? Keep on reading then!
DTF printer parts
Before we get to the problems, let’s see some parts of the printer you should know about.
- Ecotank. Container where the ink tanks are located. It should be filled up to at least one-third full of ink.
- Waste ink tank. To prevent the waste pad from filling up, a waste ink tank is added, i.e. the liquid from cleaning and maintenance of the print head. This container must be emptied regularly to avoid any breakdowns.
- Dampers. These are the cartridges located above the print head. They are connected to the Ecotank through a hose.
- Print head. It’s the component that helps transfer ink, so it requires special care. We will explain how to clean it and replace it when needed.
- Capping station. This is where the print head rests and flushes the waste ink. It keeps the head in good condition.
- Wiper blade. Rubber attachment that cleans the head when it comes out of the capping station.
Now you know the parts, let's go troubleshooting!
No colour is coming out
If this is the first time you turn on the printer, you may run into this problem. Here's how to fix it:
- INITIAL INK CHARGING: First of all, load your DTF printer with ink. To do this, open the cap of each tank and fill it with its corresponding ink. Make sure you load it with the correct colour, which is usually indicated on a label. Keep all the caps closed except the one you are filling, or you may contaminate other colours. Once they are full, turn on the printer and press the ink button for a few seconds. This will start the initial charging, which can take up to 20 minutes.
Sometimes the initial charging is not completed correctly, resulting in blank printouts. To solve this, open the Resetter software provided with the purchase of your printer. Click on 'Particular adjustment mode', go to the 'Ink charge' option and click 'OK'. In the drop-down menu choose 'Initial ink charge', tick 'Do not increase waste ink pad counter' and click on 'Ink charge'. It will ask you to restart the printer, resetting the ink charge.
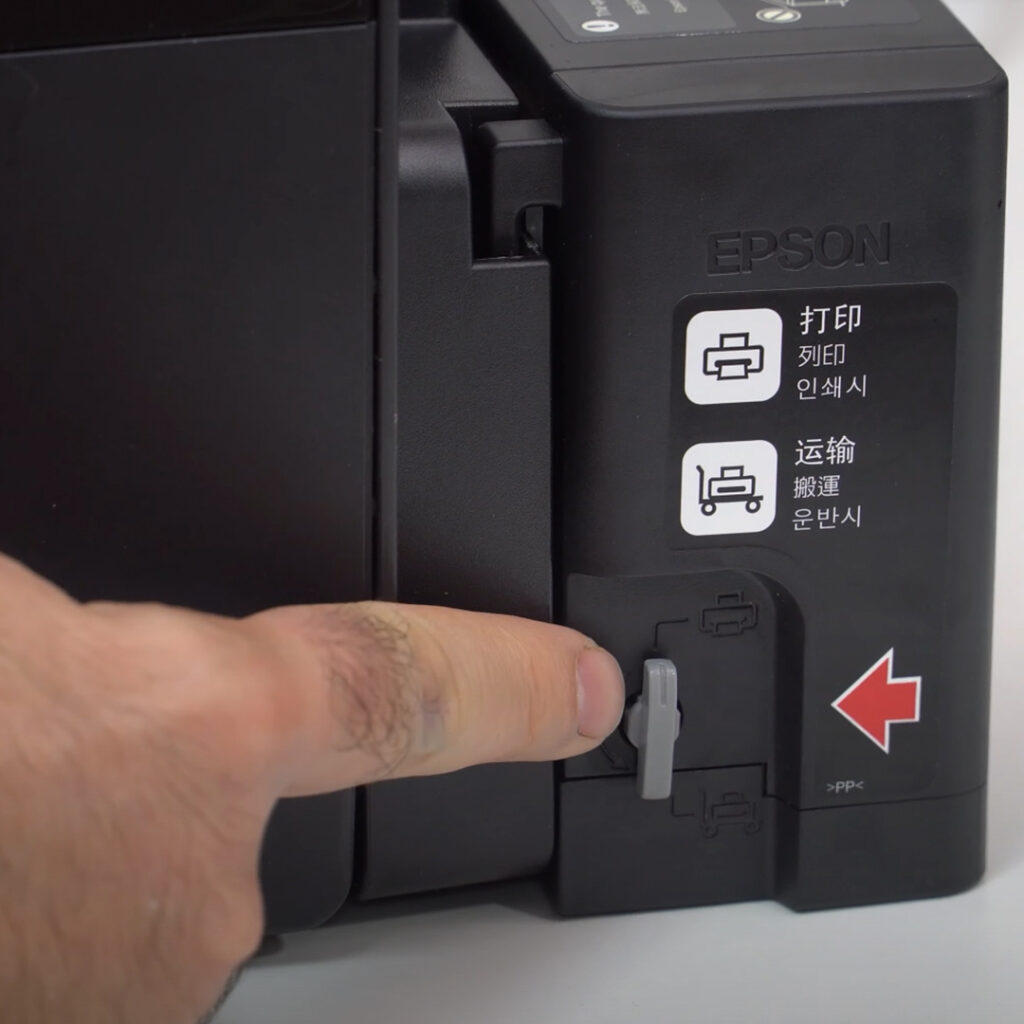
- TRANSPORTATION LOCK: Most likely, you have set the transportation lock to the locked position, which stops the ink supply from the ink tank to the print head. As a result, you may be left without ink when it runs out in the dampers. Make sure you unlock the transportation lock before printing.
Does not print white ink or any colour
This is the most common problem. Usually, this is caused by white ink sedimentation, the main source of all the issues. Here are the solutions:
- TANK STIRRING: Before performing any printing or maintenance action, you should shake the tanks to avoid sedimentation. It’s a simple but effective method that will prevent many problems. Some current printers already include this feature.
- PRINT HEAD CLEANING: Before printing, run a simple print head cleaning. If you normally use the printer, this will be enough. Go to 'Printing Preferences', 'Utilities' and select 'Print Head Cleaning'. Do a nozzle check to make sure all the colours are coming out correctly.
- POWER CLEANING: If you don’t see improvement after the head cleaning, you should run a power cleaning. This cleaning will empty the circuit and the dampers. It will then refill them by releasing pressure and unclogging the nozzles.
- SHAKING OR REPLACEMENT OF THE DAMPERS: Shake the dampers at least once every 15 days. Turn on the printer and when the print head unblocks, unplug it. Tip! Use a power strip to avoid damaging the connection when pulling. Bring the print head to the working position. Remove the screw from the cover, and loosen each damper with the help of a flat screwdriver. Now shake them to prevent sediments. Make sure there is no air in them. If there is any, you can suck it out using a syringe. If the dampers have a lot of sediment, you may need to replace them. Detach the hose and place it in the new one. Reassemble everything, and you’re all set.
- FLUSHING: This consists in flushing the cleaning solution through the nozzles of the print head. There are two types of flushing, one without removing the head and the other by disassembling it completely. Let's take a look at the differences:
Flushing without removing the print head
- Turn on the printer, and when the print head moves, unplug it from the power strip. Remove the screw and the print head cover.
- Place kitchen paper and slide the head on top of it. Take out the cartridges with the help of a flat screwdriver and keep them in order.
- Pour some liquid into the container and slightly fill the syringe.
- Attach the hose to the nozzle and lightly press the cleaning solution through the print head.
- Now repeat the operation on the clogged nozzles.
- Then put everything back in place.
Flushing by disassembling the print head
- Turn the printer on and unplug it from the power strip when the head moves to release it.
- Take it to the working area and remove the cover.
- Take off the dampers. Now free the right cover that holds the flex cables from the head with the help of a screwdriver.
- Remove the back piece next. Use a screwdriver to release the tabs located on each side. To release the head, unscrew the three remaining screws using a magnetic screwdriver.
- Remove the head and place it upside down, taking special care not to touch the silver part; otherwise, you will damage the head. Carefully release the flex cables all at once.
- Use a cleaning stick to clean around the edge of the print head, which may have dried ink on it.
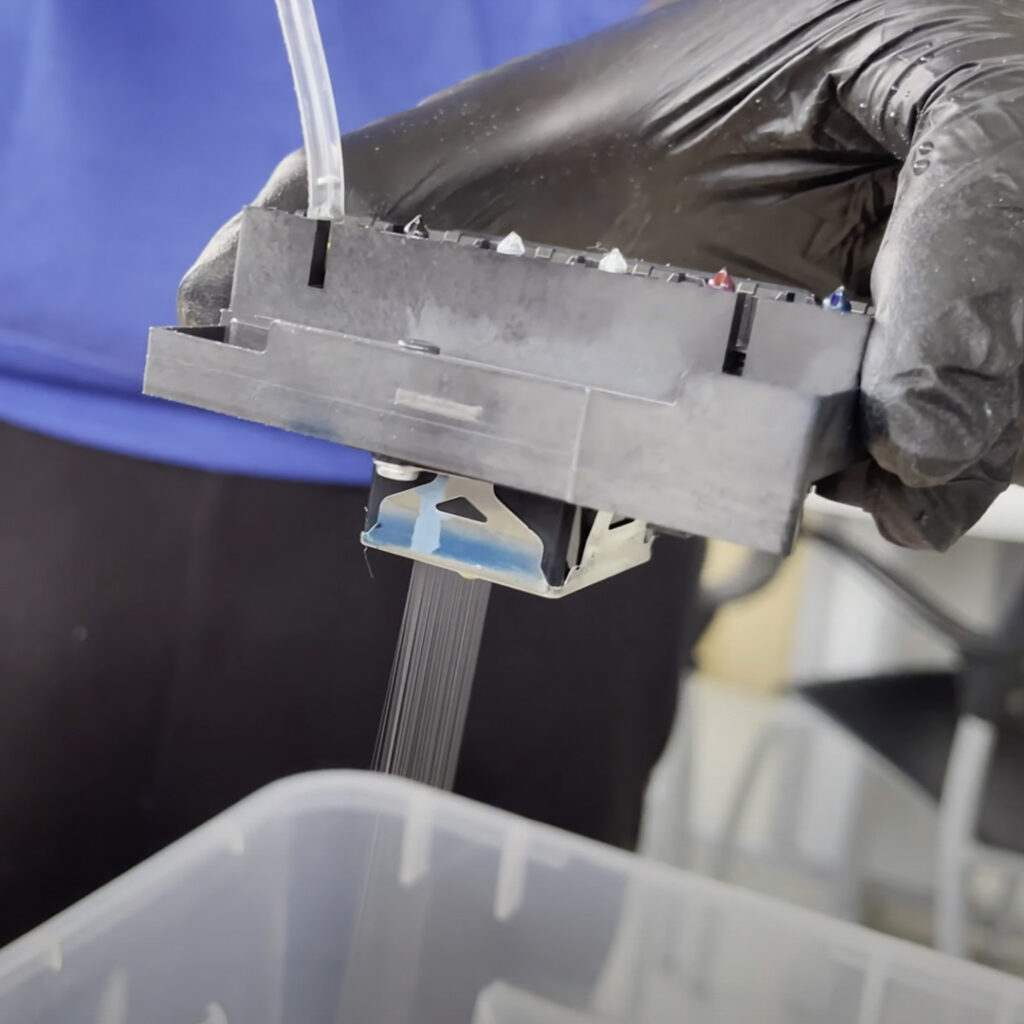
- Now use a syringe with cleaning solution and flush it through each of the nozzles. Place a bucket or container underneath, so you don't make a mess. You should press down, but not too hard. You will see ink come out, followed by the cleaning fluid.
- Once you have finished, reassemble the head. Fit the cables correctly. Put the screws, the protectors and the dampers back in place.
If there is still no ink showing after trying all the above methods, you should probably replace the print head. As explained above, taking apart the print head is not a difficult task. Simply install the new one, and your printer will be ready to use again. When you replace the print head, we recommend doing the same with the dampers.
Stains on the paper or smudged design
Sometimes, when printing, you end up getting ink smudges all over your printout. It can also happen that the ink doesn't seem to stick to the transparency film, leaving a sort of mixed ink mess. Let's see how to solve it:
- PRINTING ON THE RIGHT SIDE OF THE FILM: The transparency film has a more porous part, which allows the ink to stick. This is usually the matte side, but sometimes it's difficult to identify the printable one. If you start printing and the ink mixes, You're either using way too much ink or printing on the wrong side. But don’t worry, though. Just wipe the film with a cloth or some paper, flip it over and print. There’s no need to throw the film away.
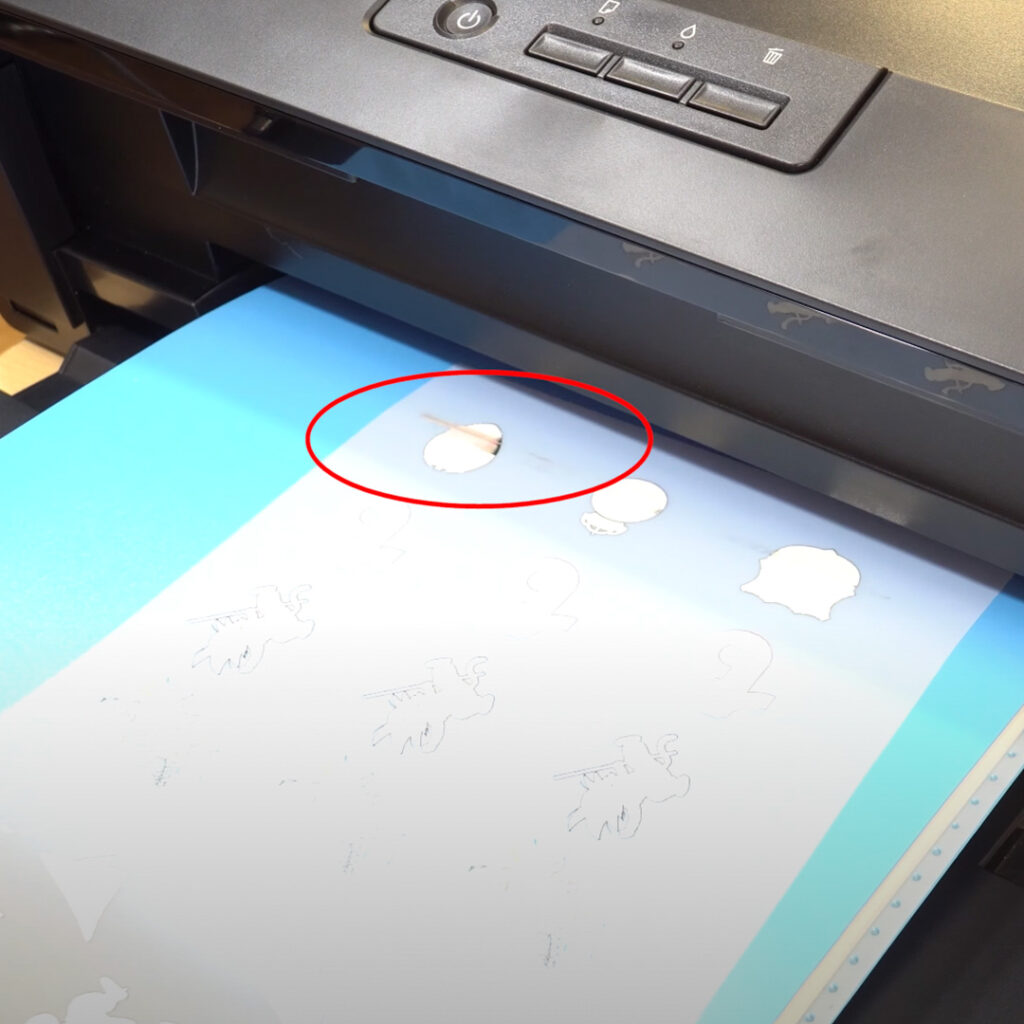
- CORRECT TRAY PLACEMENT: Often, the issue of the printhead rubbing against the design comes from a poorly positioned output tray. If there's a bump or the front of the film trips, it will lift, and the head will rub against the design. Make sure the tray is in contact with the printer but not blocking the paper output.
- DRIED INK ON THE HEAD OR WIPER BLADE: DTF ink is a paste ink that settles and solidifies. To keep the print head clean, the wiper blade wipes the underside of the head to remove any residue. The problem is that both the wiper blade and the capping station, and the head itself, eventually end up with gummy residues on the edges that need to be cleaned. To do this, unblock the head, as we have already explained. With the help of a flat screwdriver, push the wiper blade to the back of the printer. You will see that it’s full of dried ink. Clean it using tweezers, and a cleaning stick dipped in cleaning fluid. Do the same on the capping station, where you'll see that there's also solid ink on the edge. As for the head, we have already explained how to clean the edges once it’s removed.
Film feeding problems
One of the most common issues is film feeding. Either because the printer fails to grab it or because it spits it out. One of the most effective solutions is to place a board or a few sheets of paper in the paper support to stiffen the film. This will help the printer load the film correctly.
There may also be a problem of dirt on the paper feed rollers located on the right side facing the front of the printer. To clean them, use kitchen paper soaked in alcohol. Place it against the roller and press the ‘Paper Feed’ button. Clean the lower roller by rolling it.
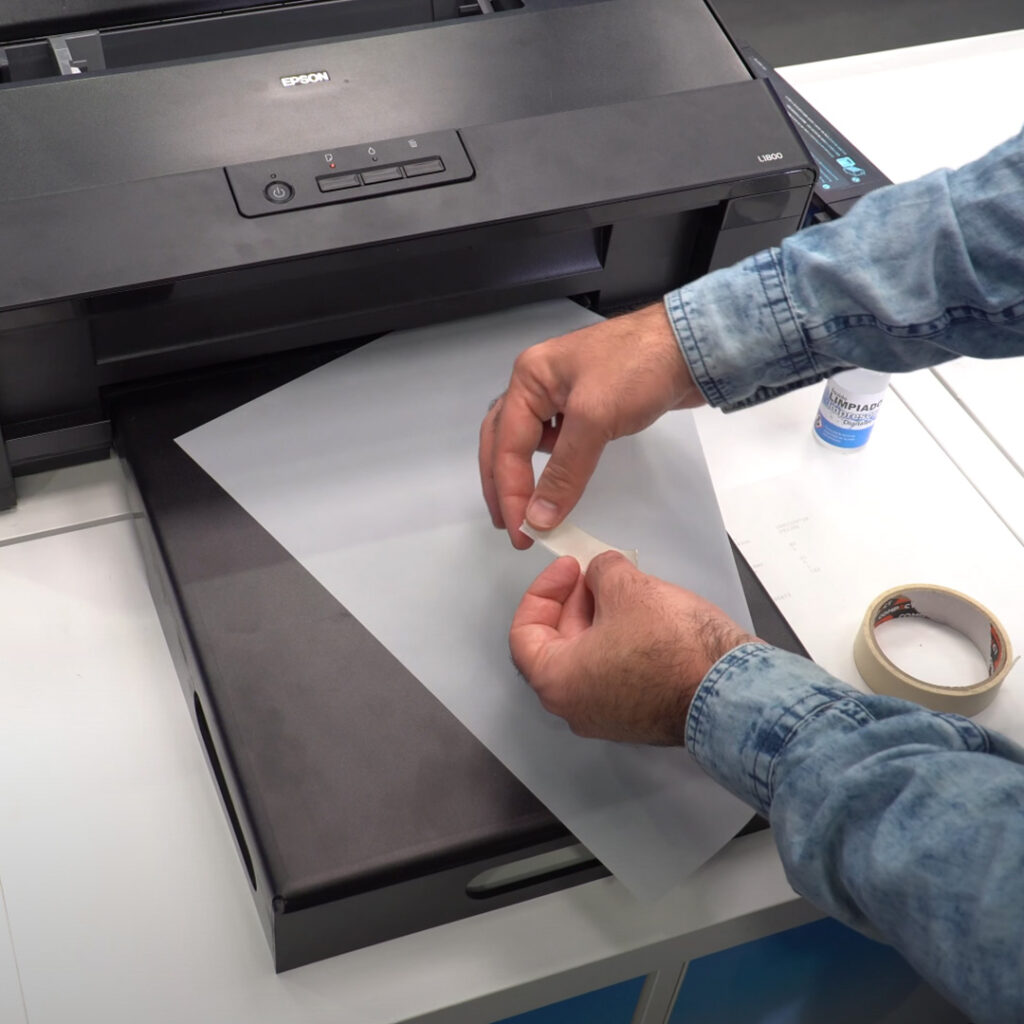
Finally, if nothing has worked, put some masking tape on the back of the bottom corner of the transparency film to prevent it from slipping when feeding.
Printer control panel lights
On the printer's front panel, you may find two types of errors besides those related to paper.
- PAPER AND INK LIGHTS FLASHING ALTERNATELY: This is because the printer assumes that the maintenance pad that gets filled with waste ink has reached the end of its service life. As you know, the printer is modified so that the ink goes into a waste ink tank and not into the pad, but the printer does not know this. To fix the error, deactivate the antivirus and open the Resetter software we sent you. Go to 'Particular adjustment mode', choose 'Waste ink pad counter', and press 'OK'. Then press ‘Check’ to read the counters. Now tick the two boxes and press ‘Initialize’. It will ask you to turn the printer off and then turn it back on. Now, if you click on ‘Check’, you’ll see the counters at zero, and the error will be solved.
- PAPER AND INK LIGHTS BLINKING AT THE SAME TIME: This indicates that something is clearly wrong. Here’s how to solve it. Clean the encoder strip using an eye cleaning wipe or a little alcohol. You can find it right above the metal guide.
This error can also happen when you move the head carriage without unblocking and removing the power. In this case, with the printer switched off, bring the carriage to its position and switch it on, although you may have damaged it.
Software problems
Some of the problems we come across are not related to the DTF printer or its maintenance but an incorrect configuration of the Digital Factory software.
There are some aspects worth considering.
- SOFTWARE AND DRIVERS UPDATES: The CADlink team keeps updating the software and drivers to fix bugs and add new features. We highly recommend you keep both up to date. To update the software, go to ‘Help’, ‘Check for updates’ and follow the on-screen steps. And for the drivers, go to 'Devices', 'Manage devices', choose yours and click on the world icon. If there are any updates, it will ask you if you want to install them. Follow the on-screen steps, and you are ready to go.
- DOES NOT PRINT A LOT OF WHITE: In the software, you have different print modes that you can modify and even create. Just go to the colour settings to increase the percentage of white ink and the amount of white that will print underneath the black colour. We have tested this using two different colour modes: One at 80% ink density and 40% underneath the black. And the second one at 100% density and 100% underneath the black. The differences are obvious at first sight.
- INCORRECT PORT CONFIGURATION: In some cases, an error may appear in the port configuration once the printing process has started. If this happens, right-click on the file to be printed and click 'Delete Error'. Go to ‘Manage Print Queues’, and in your printer, click on the drop-down menu and choose the correct port. You can now print.
Here is a more visual explanation of how to solve each of these problems:
Conclusions
•Ecotank. Container where the ink tanks are located.
•Waste ink tank. Temporary storage for your ink waste.
•Dampers. Cartridges located above the printhead.
•Printhead. Transfers an image onto the print media.
•Capping station. This is where the printhead flushes the waste ink.
•Wiper blade. Rubber attachment that cleans the head when it comes out of the capping station.
The safety caps on the tanks may be closed. You might also have set the transportation lock to the locked position, stopping the ink supply. Or maybe the initial ink charging has failed. To solve this, open the Resetter software. Click on 'Particular adjustment mode', go to the 'Ink charge' option and click 'OK'.
Usually, this is caused by white ink sedimentation or one of the other ink colours. Here are some solutions. You can shake the tank to prevent sedimentation, clean or replace the printheads, run a power cleaning, shake or replace the dampers or clean the nozzles.
This happens when the printout rubs against the printer. As a result, the design smears since the ink is still wet. It can also happen that the ink doesn't seem to stick to the film.
Either because the printer fails to grab it or because it spits it out. One of the most effective solutions is to place a board or a few sheets of paper in the paper support to stiffen the film. This will help the printer load the film correctly.
One reason is that the printer assumes that the maintenance pad has reached the end of its service life. This can be fixed from the software. As you know, the printer is modified so that the ink goes into a waste ink tank and not into the pad. In case the lights blink at the same time, clean the encoder strip with alcohol.
We really hope this maintenance and troubleshooting manual has helped you solve the main difficulties of this technique. If you have any more questions or we have left anything out, please leave us a comment so that we can help you and other users too.
You can also contact our Customer Service department to solve any queries you may have.
Remember to check our social media, where we post plenty of ideas, offers and news from all areas of personalisation. You can also follow us on Instagram, Youtube, Facebook, Pinterest and LinkedIn so you don't miss out on anything. Oh, and subscribe to this Blog to keep learning with us!
Thanks for reading, and see you soon!
Comments
Post a Comment